> ## Documentation Index
> Fetch the complete documentation index at: https://ayrshare.mintlify.site/llms.txt
> Use this file to discover all available pages before exploring further.
# User Integration
> Ayrshare के साथ कैसे integrate करें ताकि आपके उपयोगकर्ता, क्लाइंट या ब्रांड अपने सोशल मीडिया खातों को लिंक कर सकें।
Ayrshare एक API-केंद्रित platform के रूप में काम करता है, जिसे पृष्ठभूमि में विवेकपूर्ण ढंग से काम करने के लिए डिज़ाइन किया गया है।
आपके उपयोगकर्ताओं का Ayrshare interface के साथ *एकमात्र संपर्क* white-labeled सोशल लिंकिंग पेज के माध्यम से होगा, जिसे आप उनके लिए एक [JWT URL](/multiple-users/api-integration-business#single-sign-on-with-jwt-authentication) के साथ खोलते हैं।
यह प्रक्रिया आपके उपयोगकर्ताओं के लिए सहज और आसान होने के लिए डिज़ाइन की गई है, बिना उनसे खाता बनाने या लॉग इन करने की आवश्यकता के।
आपके ग्राहक कभी भी Ayrshare dashboard तक नहीं पहुँचते हैं — यह आपकी
आंतरिक टीम के लिए आरक्षित है। आप अपने लोगो, रंगों, headers और अधिक के साथ [connect accounts पेज को white-label](/multiple-users/manage-user-profiles#white-label-the-connect-accounts-page)
कर सकते हैं ताकि यह आपके product का एक मूल भाग जैसा महसूस हो।
Ayrshare आपके प्रत्येक उपयोगकर्ता को एक Ayrshare **User Profile** में व्यवस्थित करता है। एक User Profile का प्रत्येक सोशल नेटवर्क से एक कनेक्शन हो सकता है।
## उपयोगकर्ता अनुभव
आपके उपयोगकर्ता अपने सोशल मीडिया खातों, जैसे Instagram या Facebook, को authorize करेंगे ताकि आप Ayrshare के API के माध्यम से उनकी ओर से पोस्ट कर सकें, analytics प्राप्त कर सकें, आदि। **प्रत्येक User Profile का प्रत्येक सोशल नेटवर्क से एक कनेक्शन हो सकता है।**
1. अपने ऐप में, एक लिंक या बटन बनाएँ, जैसे "Link Your Social Accounts", जिस पर आपका उपयोगकर्ता सोशल लिंकिंग पेज खोलने के लिए क्लिक करेगा।
2. जब लिंक क्लिक किया जाता है, तो [/generateJWT endpoint](/apis/profiles/generate-jwt) से लौटाए गए URL के साथ एक नया browser tab, window या webview खोलें।
3. सोशल लिंकिंग पेज सभी उपलब्ध नेटवर्क दिखाएगा, जिन्हें आप [नियंत्रित](/multiple-users/manage-user-profiles#set-social-networks-access) कर सकते हैं। ऊपर आपका ब्रांडेड लोगो होगा। आप इस पेज के कई पहलुओं जैसे शीर्षक, help link और profile छवि को [अनुकूलित](/multiple-users/manage-user-profiles#user-profile-settings) कर सकते हैं।
4. आपका उपयोगकर्ता उन सोशल नेटवर्क का चयन करेगा जिन्हें वे लिंक करना चाहते हैं और पूरा होने पर All Done बटन पर क्लिक करके tab बंद कर देगा।
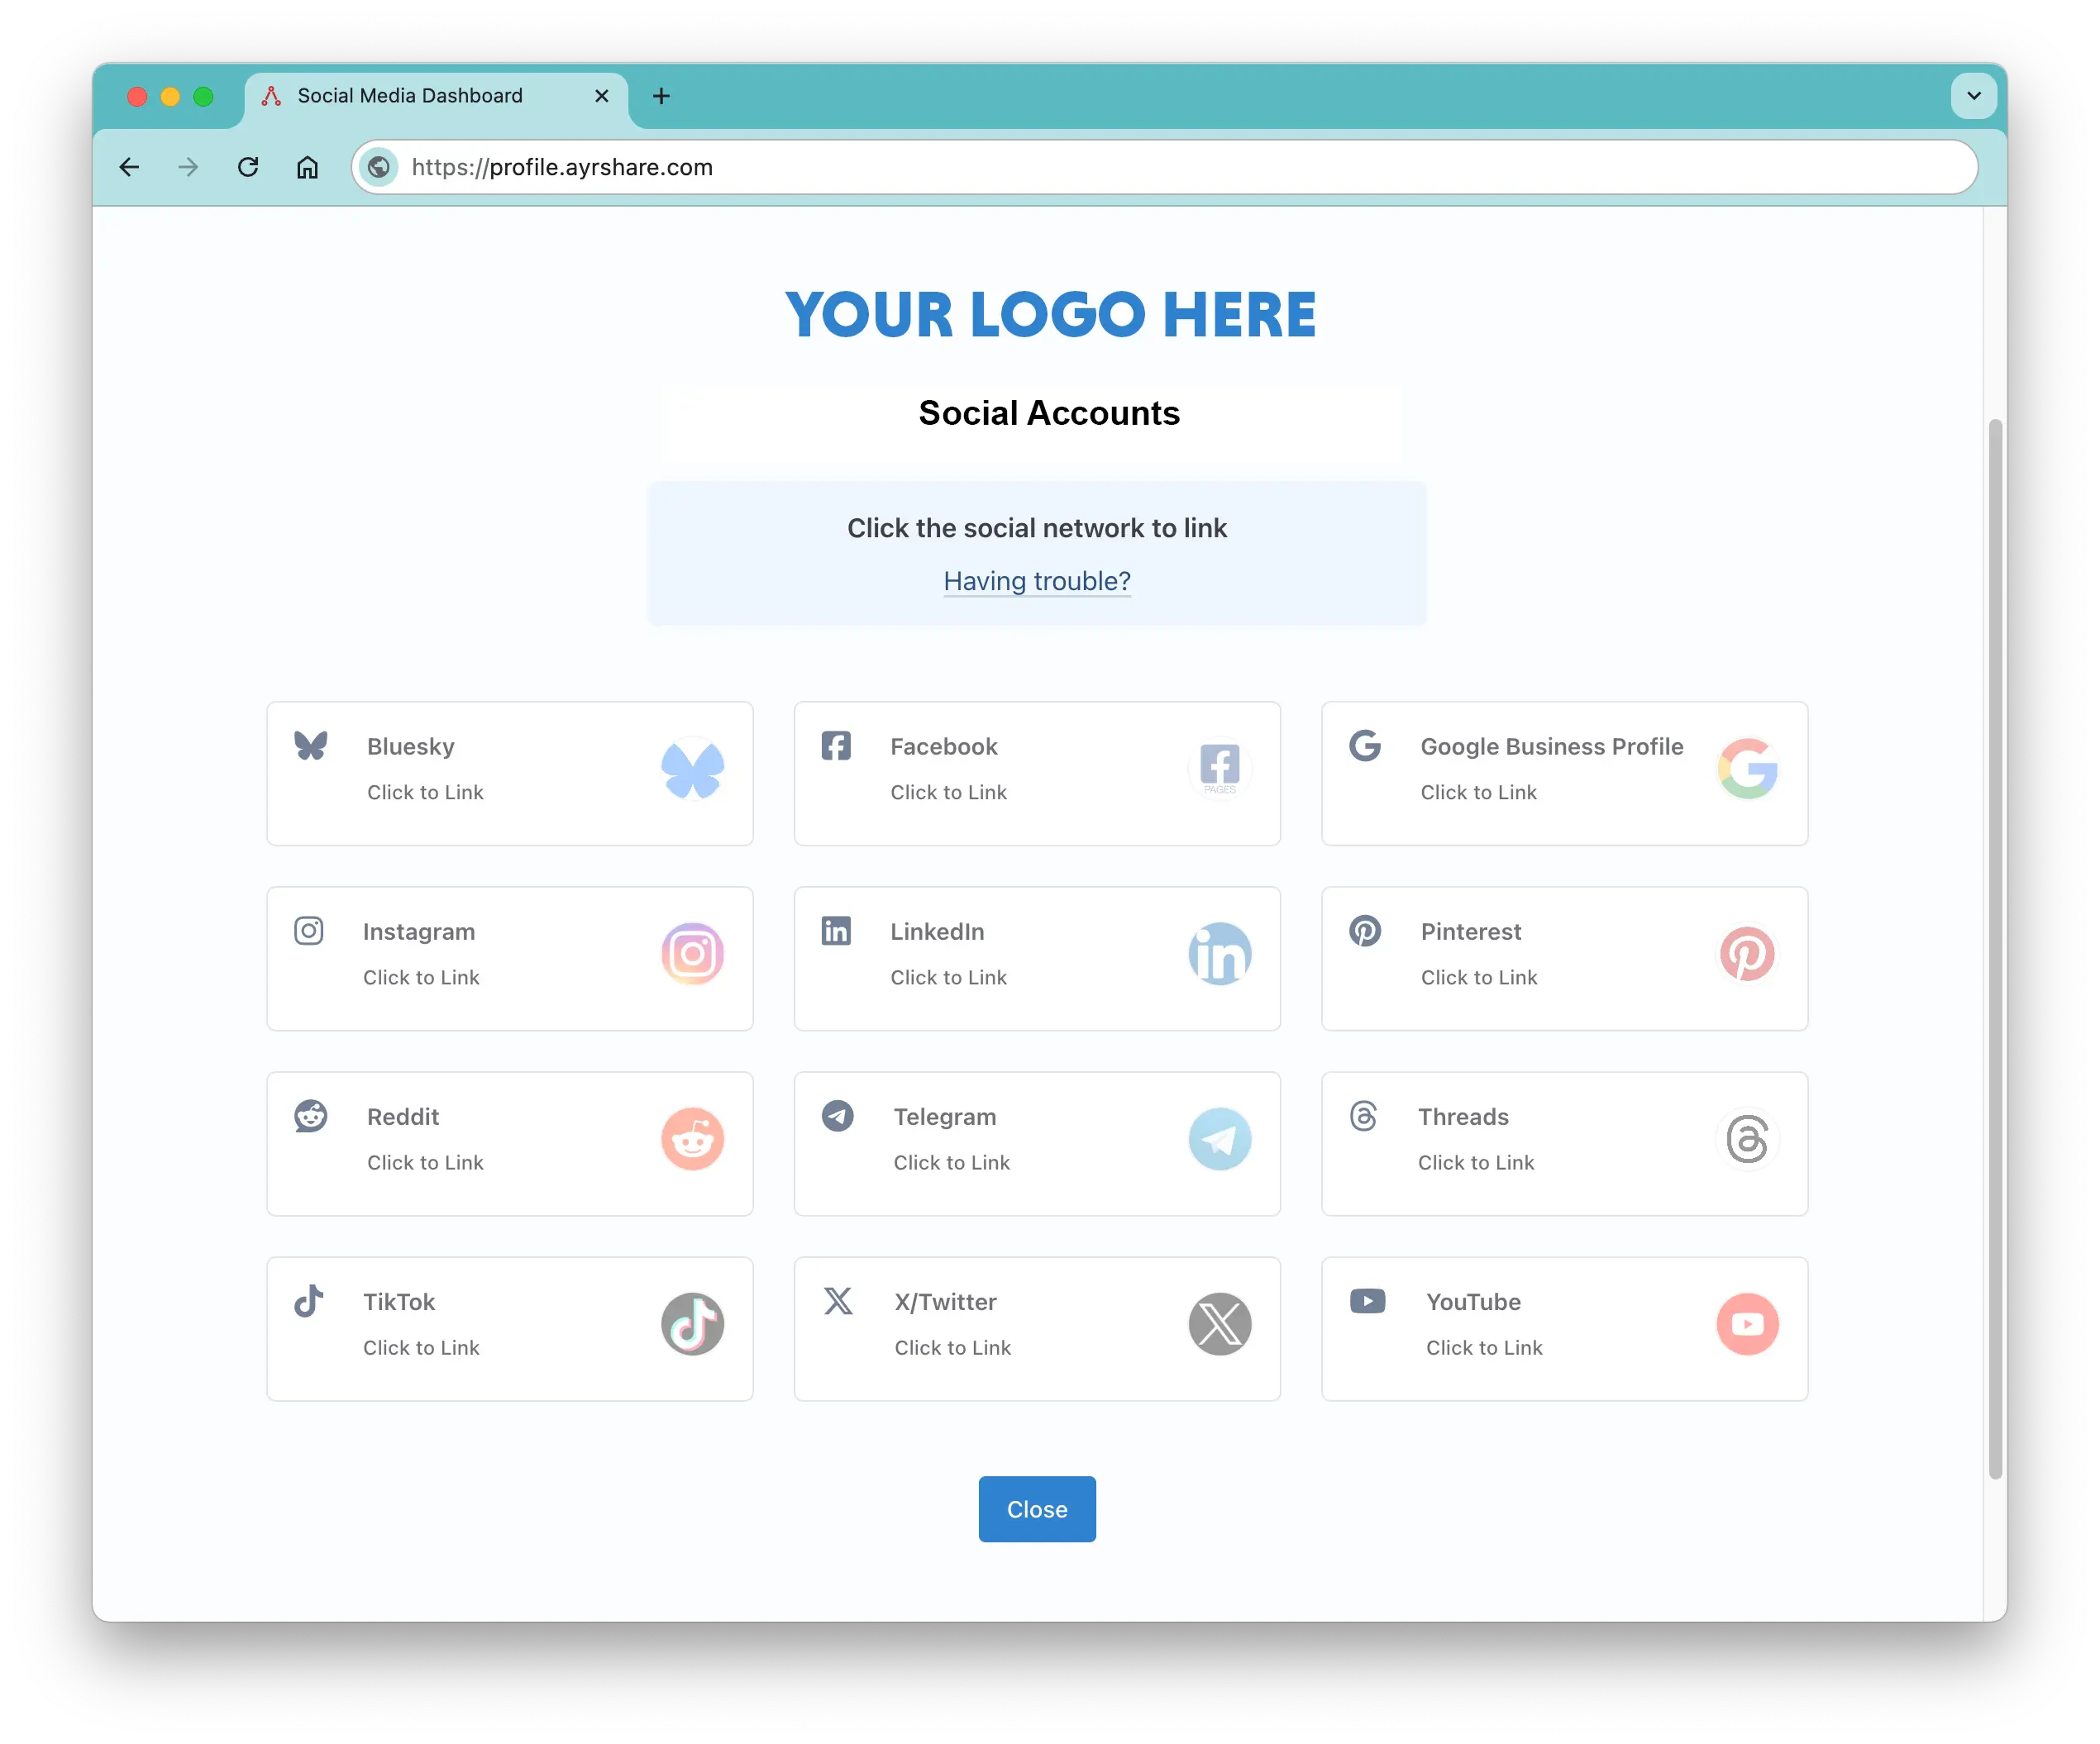
पेज के शीर्ष पर आपका ब्रांडेड लोगो होगा।
**उपयोगकर्ता के दृष्टिकोण से वे पूरा कर चुके हैं और उन्होंने अपने सोशल मीडिया खातों को सफलतापूर्वक लिंक कर लिया है**। बस कुछ क्लिक में उनके सोशल मीडिया खाते लिंक हो जाएँगे और आप उनकी ओर से पोस्ट कर पाएँगे।
पर्दे के पीछे, आप API या Dashboard के माध्यम से नए profiles बनाएँगे, उपयोगकर्ताओं की ओर से पोस्ट करने के लिए उपयोग की जाने वाली Profile Key प्राप्त करेंगे, और single sign on करने के लिए एक JWT token पास करके ऊपर दिए गए सोशल लिंकिंग पेज को खोलेंगे।
यह कैसे करें, इसके लिए कृपया API Integration for Business पर अगला पेज देखें।
## सोशल लिंकिंग पेज अनुकूलन
आप सभी उपयोगकर्ताओं या विशिष्ट उपयोगकर्ताओं के लिए सोशल लिंकिंग पेज के कई हिस्सों को
अनुकूलित कर सकते हैं। विवरण के लिए कृपया प्रत्येक अनुभाग देखें। Max Pack के साथ और बिना, Business और Launch Plans के लिए
विशिष्ट विवरण भी हैं।
### Business Plan और Launch Plan अनुकूलन
-
अपना स्वयं का [कंपनी
लोगो](/multiple-users/manage-user-profiles#update-logo-on-social-linking-page) जोड़ें या पूरी तरह से हटा दें।
विवरण के लिए कृपया अपनी onboarding integration guide देखें।
-
चुनें कि आपके उपयोगकर्ता किन सोशल नेटवर्क तक पहुँच सकते हैं, या तो
[वैश्विक स्तर पर](/multiple-users/manage-user-profiles#set-social-networks-access) या [user
profile स्तर पर](/apis/profiles/overview#enable-or-disable-social-networks)।
-
help पेजों के लिंक हटाएँ और [अपने स्वयं के help
पेज जोड़ें](/multiple-users/manage-user-profiles#help-links-visible)।
-
सोशल लिंकिंग पेज को बंद करने के लिए [पेज
redirect](/multiple-users/api-integration-business#opening-and-closing-the-social-linking-url)
सेट करें।
-
सोशल लिंकिंग पेज पर [शीर्ष और उप-headers](/apis/profiles/create-profile) सेट करें।
आप अपने उपयोगकर्ता का नाम, उनका व्यवसाय, कोई अन्य संदेश दिखा सकते हैं, या पूरी तरह से हटा सकते हैं।
### Business Plan और Launch Plan Max Pack अनुकूलन
-
अपनी स्वयं की [custom CSS
फ़ाइल](/multiple-users/manage-user-profiles#customize-css) के साथ अपने सोशल लिंकिंग पेज की उपस्थिति को व्यक्तिगत बनाएँ - रंग, फ़ॉन्ट संशोधित करें, और नियंत्रित करें
कि कौन सी सुविधाएँ प्रदर्शित हों।
-
सोशल लिंकिंग पेज पर अपना स्वयं का [favicon और
शीर्षक](/multiple-users/manage-user-profiles#change-page-title-close-button-and-favicon) जोड़कर browser tab को अनुकूलित करें।
-
सोशल लिंकिंग पेज पर ['Close' बटन टेक्स्ट](/multiple-users/manage-user-profiles#change-page-title-close-button-and-favicon) को संपादित करें।
-
टेक्स्ट या HTML का उपयोग करके सोशल लिंकिंग पेज पर [custom footer content](/multiple-users/manage-user-profiles#footer-text)
जोड़ें - आपके कॉपीराइट नोटिस या वेबसाइट लिंक के लिए एकदम सही।
-
लाइव सोशल खातों के साथ परीक्षण करने के लिए एक staging server वातावरण सेट करें, आपकी plan की User
Profile सीमा तक।
**Business Plan** और **Launch Plan** ग्राहक अधिक अनुकूलन विकल्पों के लिए [Max Pack](/additional/maxpack) खरीद सकते हैं।
**Enterprise Plan** ग्राहकों को
[उन्नत सुविधाएँ](/multiple-users/manage-user-profiles#enterprise-features) मिलती हैं।